|
As scrapbookers everywhere begin to take more and more photos, the desire for a home studio is increasing. One of the biggest challenges that we face in our quest is the need for effective backgrounds, “the canvas” for our photographs.
Keep it simple. It is important when choosing a backdrop material to keep it simple. For the most part, you will also want to create a smooth, seamless surface. There are unlimited possibilities in choosing a backdrop. Some ideas are:
- large sheets of colored paper (from an art supply store)
- fabric sold by the yard (muslin, velvet, broadcloth, felt or fleece)
- countertop material (from a hardware store or local merchant)
- old linens (sheets, curtains, etc.)
- painted sheets of wood
Consider the subject. Use something that doesn’t distract from your subject. A brunette will look better on a light backdrop, while a blond will contrast nicely with a dark background. Brunettes especially can easily get “lost” in a dark background. In the same manner, consider the clothing that the subject will be wearing and look for a background color that provides a nice contrast and will allow your subject to be the main focus of the image.
Determine a location. Another aspect to consider is where you are going to put your backdrop. Will it be free standing like a sheet of wood or will it need to be hung?
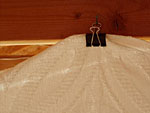
There are several methods that I have tried for hanging backdrops. My favorite is using binder clips on the top of the paper or fabric and hanging them from nails that I have placed in the wall. You could also string wire or rope through the casing of linens or use PVC pipe from a hardware store to build a frame and attach your backdrop with clamps. Others have tried draping fabric over the back of a couch or table. All are effective ways, as long as you anchor them securely.
Here are some other tips for a professional look when photographing with a backdrop:
- For full body portraits, extend the backdrop beneath the subject as well as behind them to create a uniform background.
- Avoid a horizontal line “cutting” your photo in half by pulling, from the front, the bottom edge of your fabric backdrop towards you until it creates a natural curve.
- Position your subject three to four feet in front of the backdrop. You can then focus on the subject and blur the background for a more subtle look.
- Zoom in closer to the subject to eliminate the need for a fancy backdrop, as less of it will show in the final image.
- If your backdrop is not a smooth surface, use a reflector opposite from your lighting to help minimize distracting shadows.
Ultimately, the amount of time and space that you have will be the determining factors to how much of a home studio you can create. Experimenting with different backdrops can be fun and can produce great results in your photos.
|

|